Zoom has built-in whiteboard and annotation options you can use in your course meetings. This blog will cover some of the basic functionalities of the Zoom whiteboard as well as how you can use it in your online course meetings this semester.
Zoom provides step-by-step instructions that demonstrate how you can share a whiteboard with your students.
Is the Zoom whiteboard the best whiteboard for my class?
While the Zoom whiteboard is useful (and conveniently built-into the platform), it may not have the features you need for your particular course, discipline or use case. Learning Innovation’s Flexible Teaching website has put together a guide on best practices for using online whiteboards, which includes a comparison of Zoom whiteboard’s functionalities to other options.
If you want to use a phone, tablet or stylus, OIT has created an annotation and handwriting guide. You do not need a secondary device or stylus to use the Zoom whiteboard, but keep in mind that drawings may be difficult to produce and read with a mouse.
Using Zoom Whiteboard for Large Class Discussion
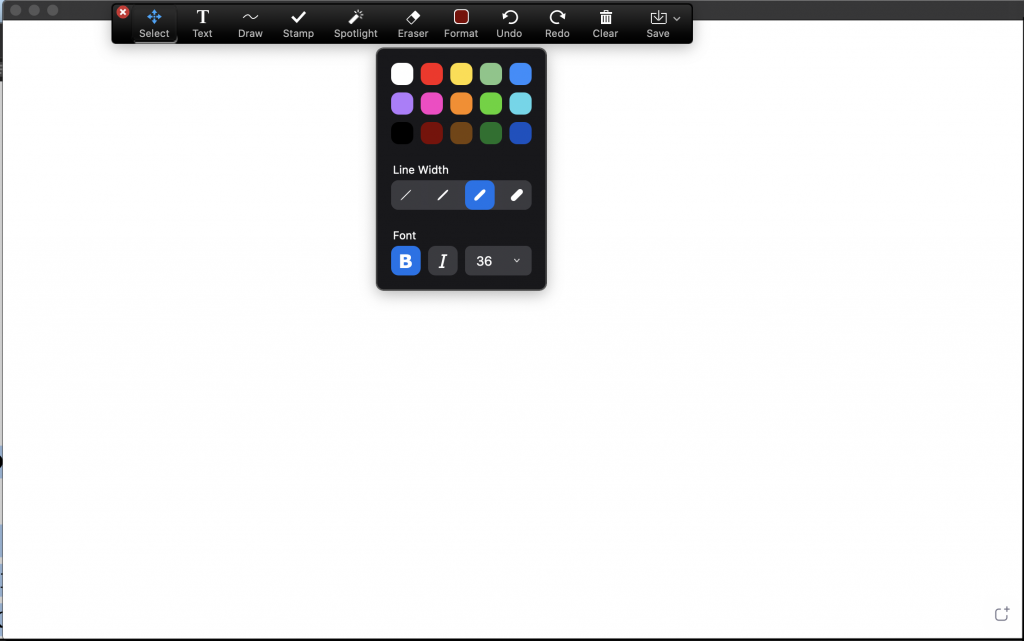
In your main Zoom meeting room, you can use the Zoom whiteboard in place of a dry erase or chalkboard. You can mark your whiteboard using simple Zoom annotation tools, including text, draw, stamps and an eraser. There are functions that allow you to redo or undo annotations, clear your drawings and clear the drawings of other participants. Zoom provides a selection of colors for text and drawings, and you can bold, italicize or change the font. Keep accessibility standards in mind when using these features.
You can copy and paste text onto the Zoom whiteboard, so if you wanted to have your students look closely at a passage or problem together, you could quickly make that information available using the text function.

In the above example, I have posted the opening lines from Pride and Prejudice with annotations created in Zoom. The annotation tools provide multiple ways to engage your students in course activities.
You can highlight portions of the text (using the “draw” tool and selecting the square or circle that looks like a grid), use arrows to call attention to certain attributes of the text (the arrows from the draw function can point in multiple directions) and change text colors and sizes to distinguish notes about the passage from the passage.
The whiteboard can also be used to adapt active learning techniques such as “Focused Listing” to the virtual classroom (you can read about how Learning Innovation has done this in our own workshops). If, for instance, you wanted your students to participate in a group brainstorm, you could ask them a question (and post it on the whiteboard for clarity) that they could answer by shouting out answers or sending them through chat, while you wrote them down.
If you would like to save any of your whiteboard activities for your class, you can do so by clicking “Save” at the right-end of the annotation menu. You can save your whiteboard as a PNG or PDF.

Using Zoom Whiteboard with Multiple Annotators
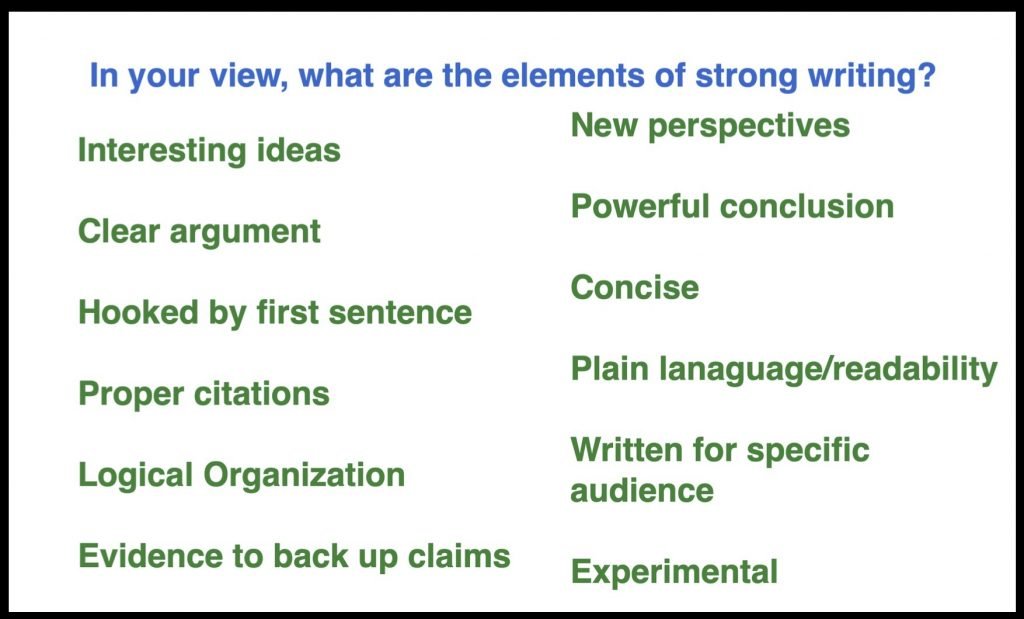
Students may also simultaneously annotate on the whiteboard. For example, perhaps after your class finished brainstorming, you might ask students to individually use the stamp tool to place a check or star by an idea they particularly liked, as illustrated by the example below.

Encouraging students to use the annotation tool gives them another opportunity to participate. Duke Senior Lecturer of Romance Studies Melissa Simmermeyer has also demonstrated how to use Zoom annotation outside of the whiteboard for instructional and icebreaker activities.
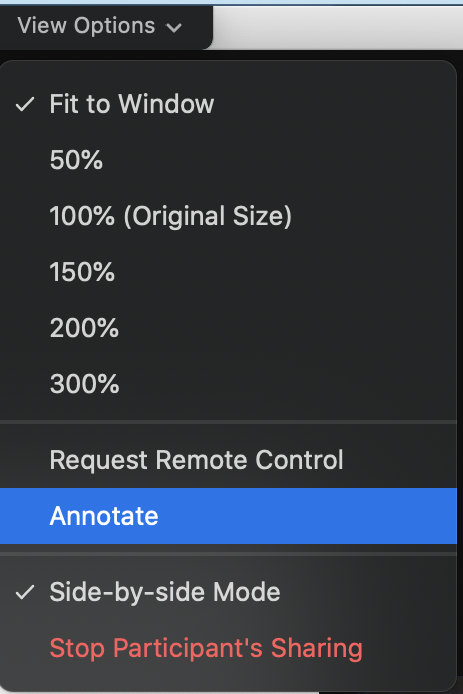
You need to ensure in advance of the activity students know how to locate their own set of annotation tools. At the top of your students’ screens, they should see a green bar alerting them to the fact that you are sharing your screen next to a black rectangle with white text reading “View Options.” Students should click the drop-down arrow next to “View Options.”

A drop down menu should appear, and one of the options near the bottom should be “Annotate.” Once students select “Annotate,” their own toolbar will appear.
In addition to activities that require relatively small annotations on the part of the student, you might ask your students to participate in ice-breaker activities that require all of them to contribute to the board.

Or, after returning from small group breakout rooms, you may ask group leaders to write summaries of the discussion on the whiteboard. If you plan to do this, be sure to work out of logistics of where students are writing, as you want to avoid any overlapping text.
Using Zoom Whiteboard for Peer Work
Whiteboards can also be used in Zoom breakout rooms. One student in each room can share their screen with the whiteboard, so long as you have allowed all participants to share their screens.
To enable this setting, go to “Share Screen” at the bottom of your Zoom meeting. Once there, click on the green arrow, which will generate a menu. Click on “Advanced Sharing Options.”

Once you have clicked on “Advanced Sharing Options,” a pop-up menu with those options will appear.

Under the “Advanced Sharing Options” category “Who can share?” be sure that “All Participants” is selected to allow students to share their screens.
You might have students use whiteboard boards in breakout rooms to brainstorm or provide peer-review. These whiteboards could be saved by the students sharing their screen to be turned into you, shared with the larger group after the course session or simply downloaded for the group’s personal review.
Before you send students into their breakout rooms, be sure to walk them through how to share their screens and find the Zoom annotation tools. Remind students they can use the “Ask for Help” button on the bottom of their breakout room screens if they run into technological issues.
Zoom Whiteboard Resources
Sharing a Whiteboard (Zoom)
Using Annotation Tools on a Shared Screen or Whiteboard (Zoom)
How Can I Use Whiteboards Online? (Learning Innovation)