Wondering where your colleague found striking images for their PowerPoint presentation? Can’t figure out how to keep the PNG of a table you inserted into your Google Doc from filling the entire screen? These quick tips will sort out how to find and format images effectively.
Finding Images
If you need to search for digital images, the best practice is to locate images that aren’t under restrictive copyright protection. While fair use applies to most educational uses of images, you never know when you may want to share materials in a more public setting.
To limit your Google Image search to reusable images, use the Tools button to reveal Usage Rights.

There are other websites designed specifically for finding open source images. Creative Commons Search allows you to choose from multiple sources, such as Wikipedia Commons. Pixabay offers an extensive collection of copyright-free photographs. The Noun Project is a good source for icons.
Images that are listed as CCO or public domain do not require citations, but many images have other types of creative common licenses. Can’t recall how various types of images are cited in your discipline? Refer to Purdue’s Online Writing Lab for help.
Whenever possible, visit the website to download the image as .png or .jpg instead of copying and pasting. You will most likely get a higher quality image and you can find the citation information more easily. Unless you have a need for high resolution or large images, the medium sized .jpg files are usually sufficient. Consider renaming the files to something you’ll recognize and keeping them with other files attached to the project.
Inserting Images
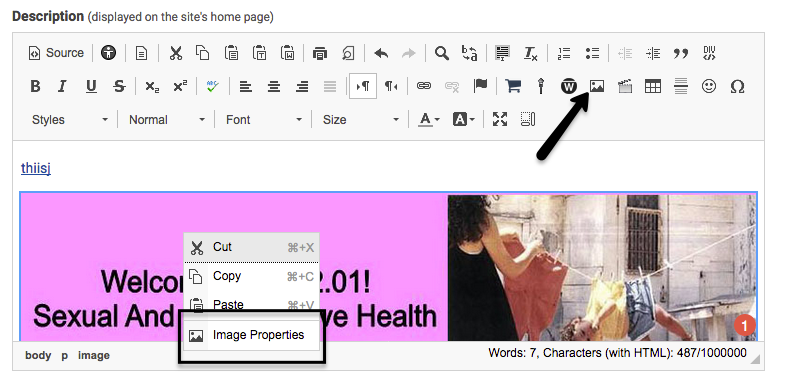
To add an image into many applications, look for the insert picture icon in the editor box. Some applications will let you drag and drop images directly into the document. Others have a separate upload media button or insert picture command, such as WordPress or PowerPoint. If you need to resize the image, usually you can right click on it and find the Image Properties or locate an pencil icon to edit. It is often also possible to click on the corner of an image, then hold down your mouse to resize manually. This image illustrates how the insert picture icon and Image Properties appear in the Sakai editor box.
Pro Tip
When uploading images to the web, be sure to fill in the alternative text description to allow the visually-impared access to the material.

Want to get even better at using digital images? Try using Lynda, an online video database for learning many types of software. Duke users can access it for free.